Lately there has been a lot of attention on the effects of poor air quality. From life expectancy to cognitive performance, air quality affects many aspects of our well being. So, monitoring air quality in a home, such as with a sensor, is more than a bored person’s folly. Air quality measurements may offer an explanation for physical or mental ailments. And air quality can be improved by increasing ventilation, such as by opening windows, or increasing circulation, such as by turning on a fan.
I only became aware of fluctuations in air quality after moving to Seattle and experiencing a stinky summer. Smoke was migrating from forest fires in the South. The city reeked of burning tar and the sky was a foggy red. Everyone sheltered inside like they were awaiting a nuclear event and propped box fans outfitted with filters in the windows.
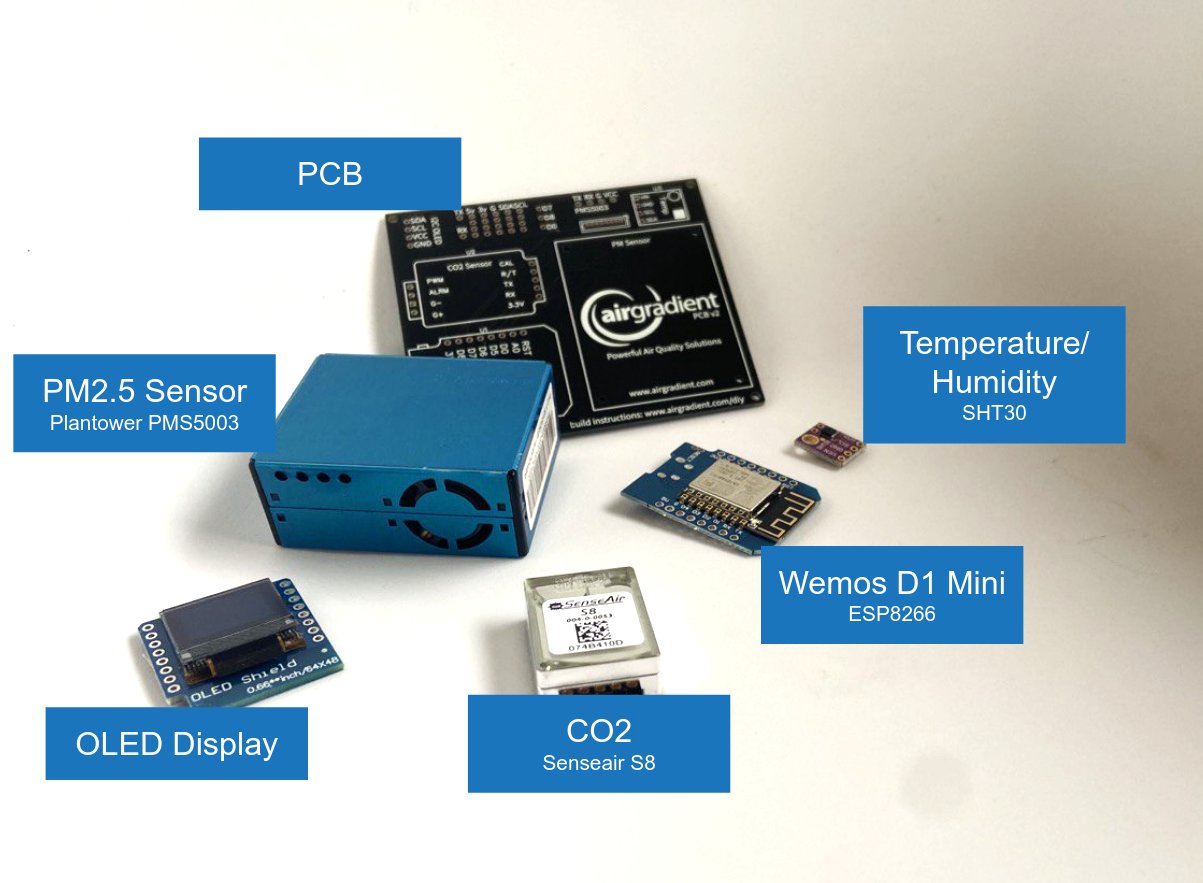
Luckily for me, I was gifted an air quality sensor kit from AirGradient this Christmas. The kit is affordable compared to other air quality monitors and has the benefit of reading not only AQI, but CO2, temperature, and humidity.
The kit included the following: Wemos D1 Mini microcontroller Wemos OLED display Plantower PMS5003 PM Sensor Senseair S8 CO2 Sensor SHT30 or SHT31 Temperature and Humidity Sensor Module PCB Pins
The only equipment not included was a computer, a micro USB cable (with data), and a soldering iron. A breadboard and tape, while not essential, was helpful. The first step was to install Arduino Software on my computer, connect the microcontroller to the computer using the USB cable, enable the microcontroller on Arduino, and test the connection with a blink sequence. Once I confirmed that the microcontroller was connected, I installed the AirGradient library and flashed firmware to the microcontroller.
The next step was to attach pins to the components. I used a breadboard to keep the pins straight and the components stable while soldering. This was my first time soldering. At first, I seemed stuck between either leaving giant globs of metal on the pins and or depositing insufficient. But, I started to get the hang of it and develop a sense of how much metal was enough.
It also took the wire getting stuck to the pin a few times before I learned not to remove the solder from the pin before removing the wire. I had a slight mishap when I joined two of the pins. But my clever lab partner reheated the bridging metal and blew on it, creating a gap in the connecting point. And a disaster was averted.
The PMS sensor required 4 wires to be connected and soldered to the PCB. Stripping the wires was a pain in the butt. I kept cutting them, instead, and the intervention of my lab partner was again required.

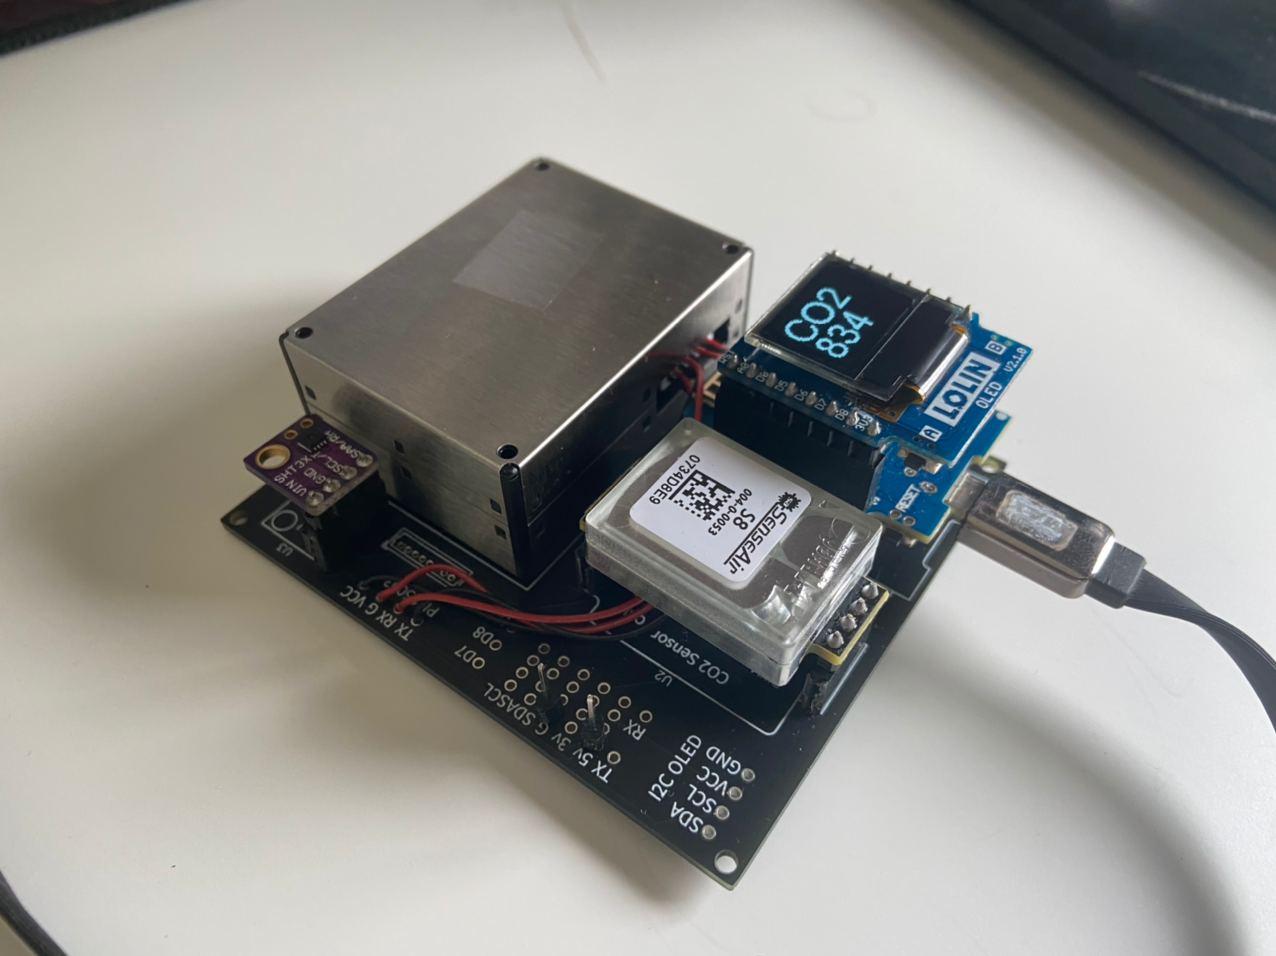
Next I soldered the pins to the PCB. Some of the leads were very long, so I snipped them.
The PMS was a big boy without any pinholes, so I taped it to the PCB instead of soldering it.
Finally, it was time to connect!
I plugged the USB into the microcontroller and into a power source. The OLED screen lit up and voila! Air quality data at my fingertips.
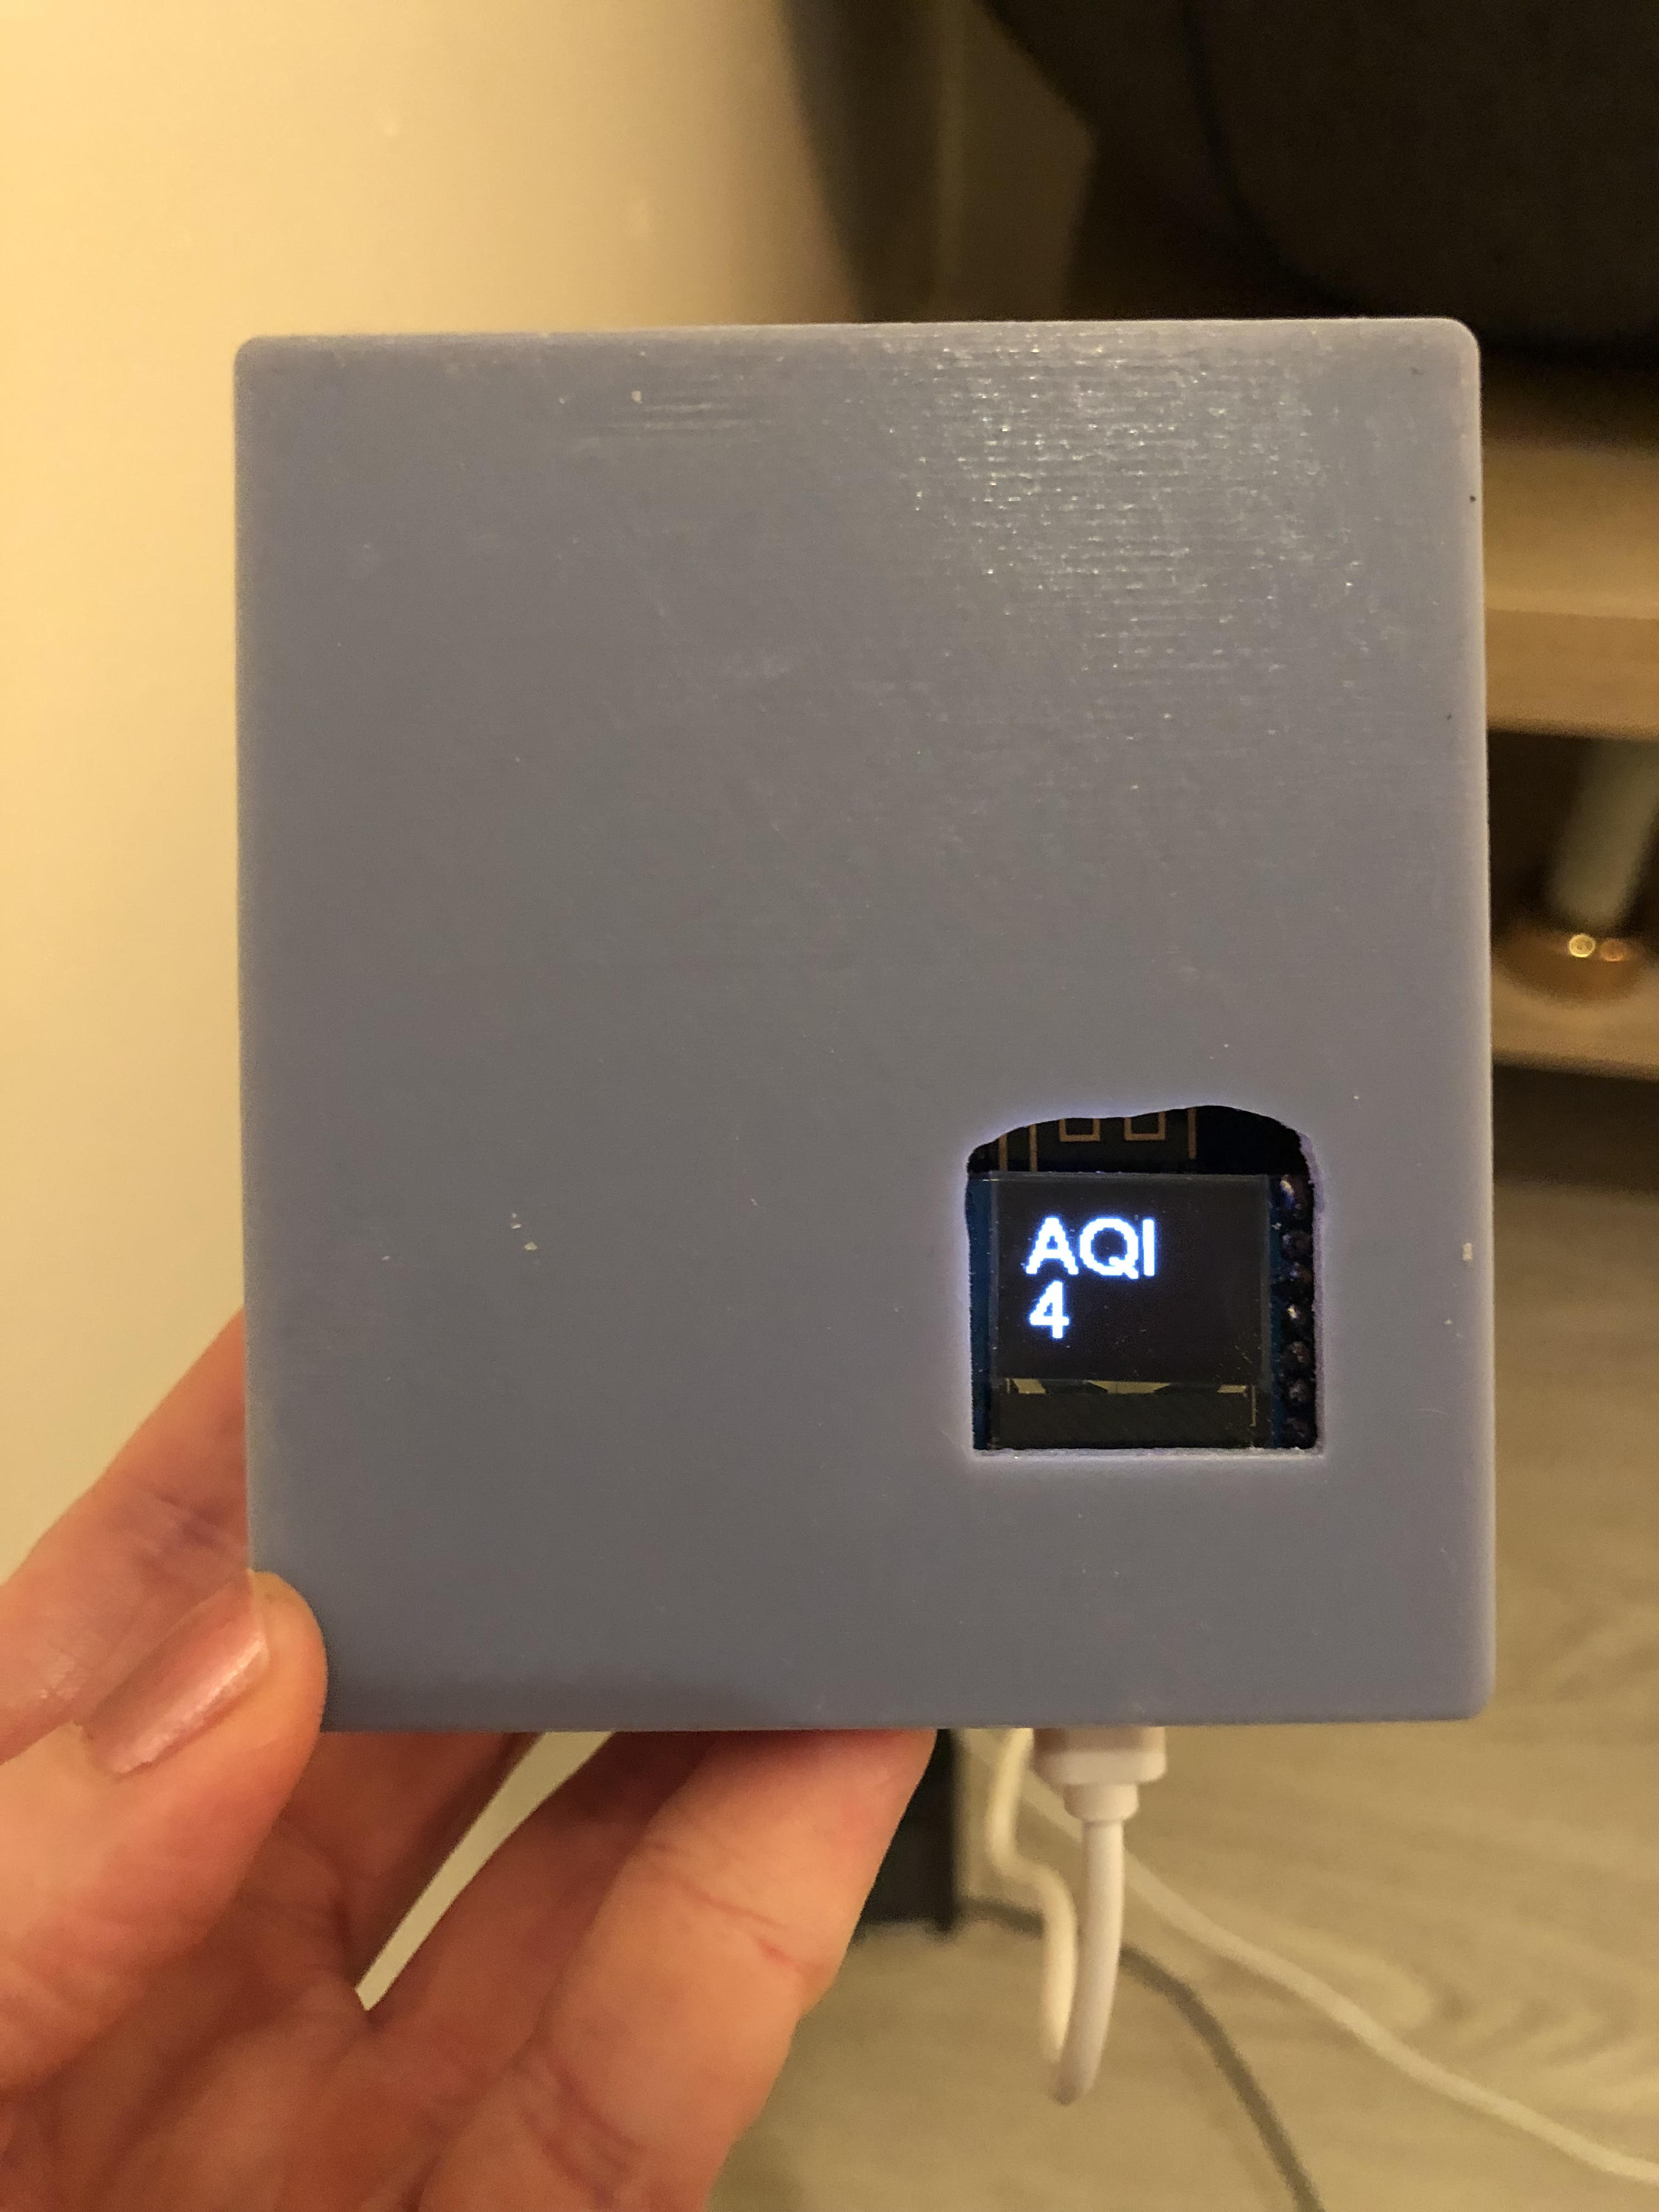
AirGradient offers instructions to 3D print an enclosure for the sensor. My lab partner printed one for me. At first the sensor did not seem to fit inside the case. But after some finageling of the PSB and snipping leads, it fit. The display window still did not line up to the OLED, so I enlarged the aperture with a dremel. I went a little nuts with the dremel and ended up carving a Wonderbread-shaped hole. But gets the job done.
Then it was time to get testing. We had long suspected that the air quality in my “garden unit” apartment was bad. Only one of my windows can be opened and I have no ventilation for cooking. But to my surprise, the AQ hovered around 4-20.
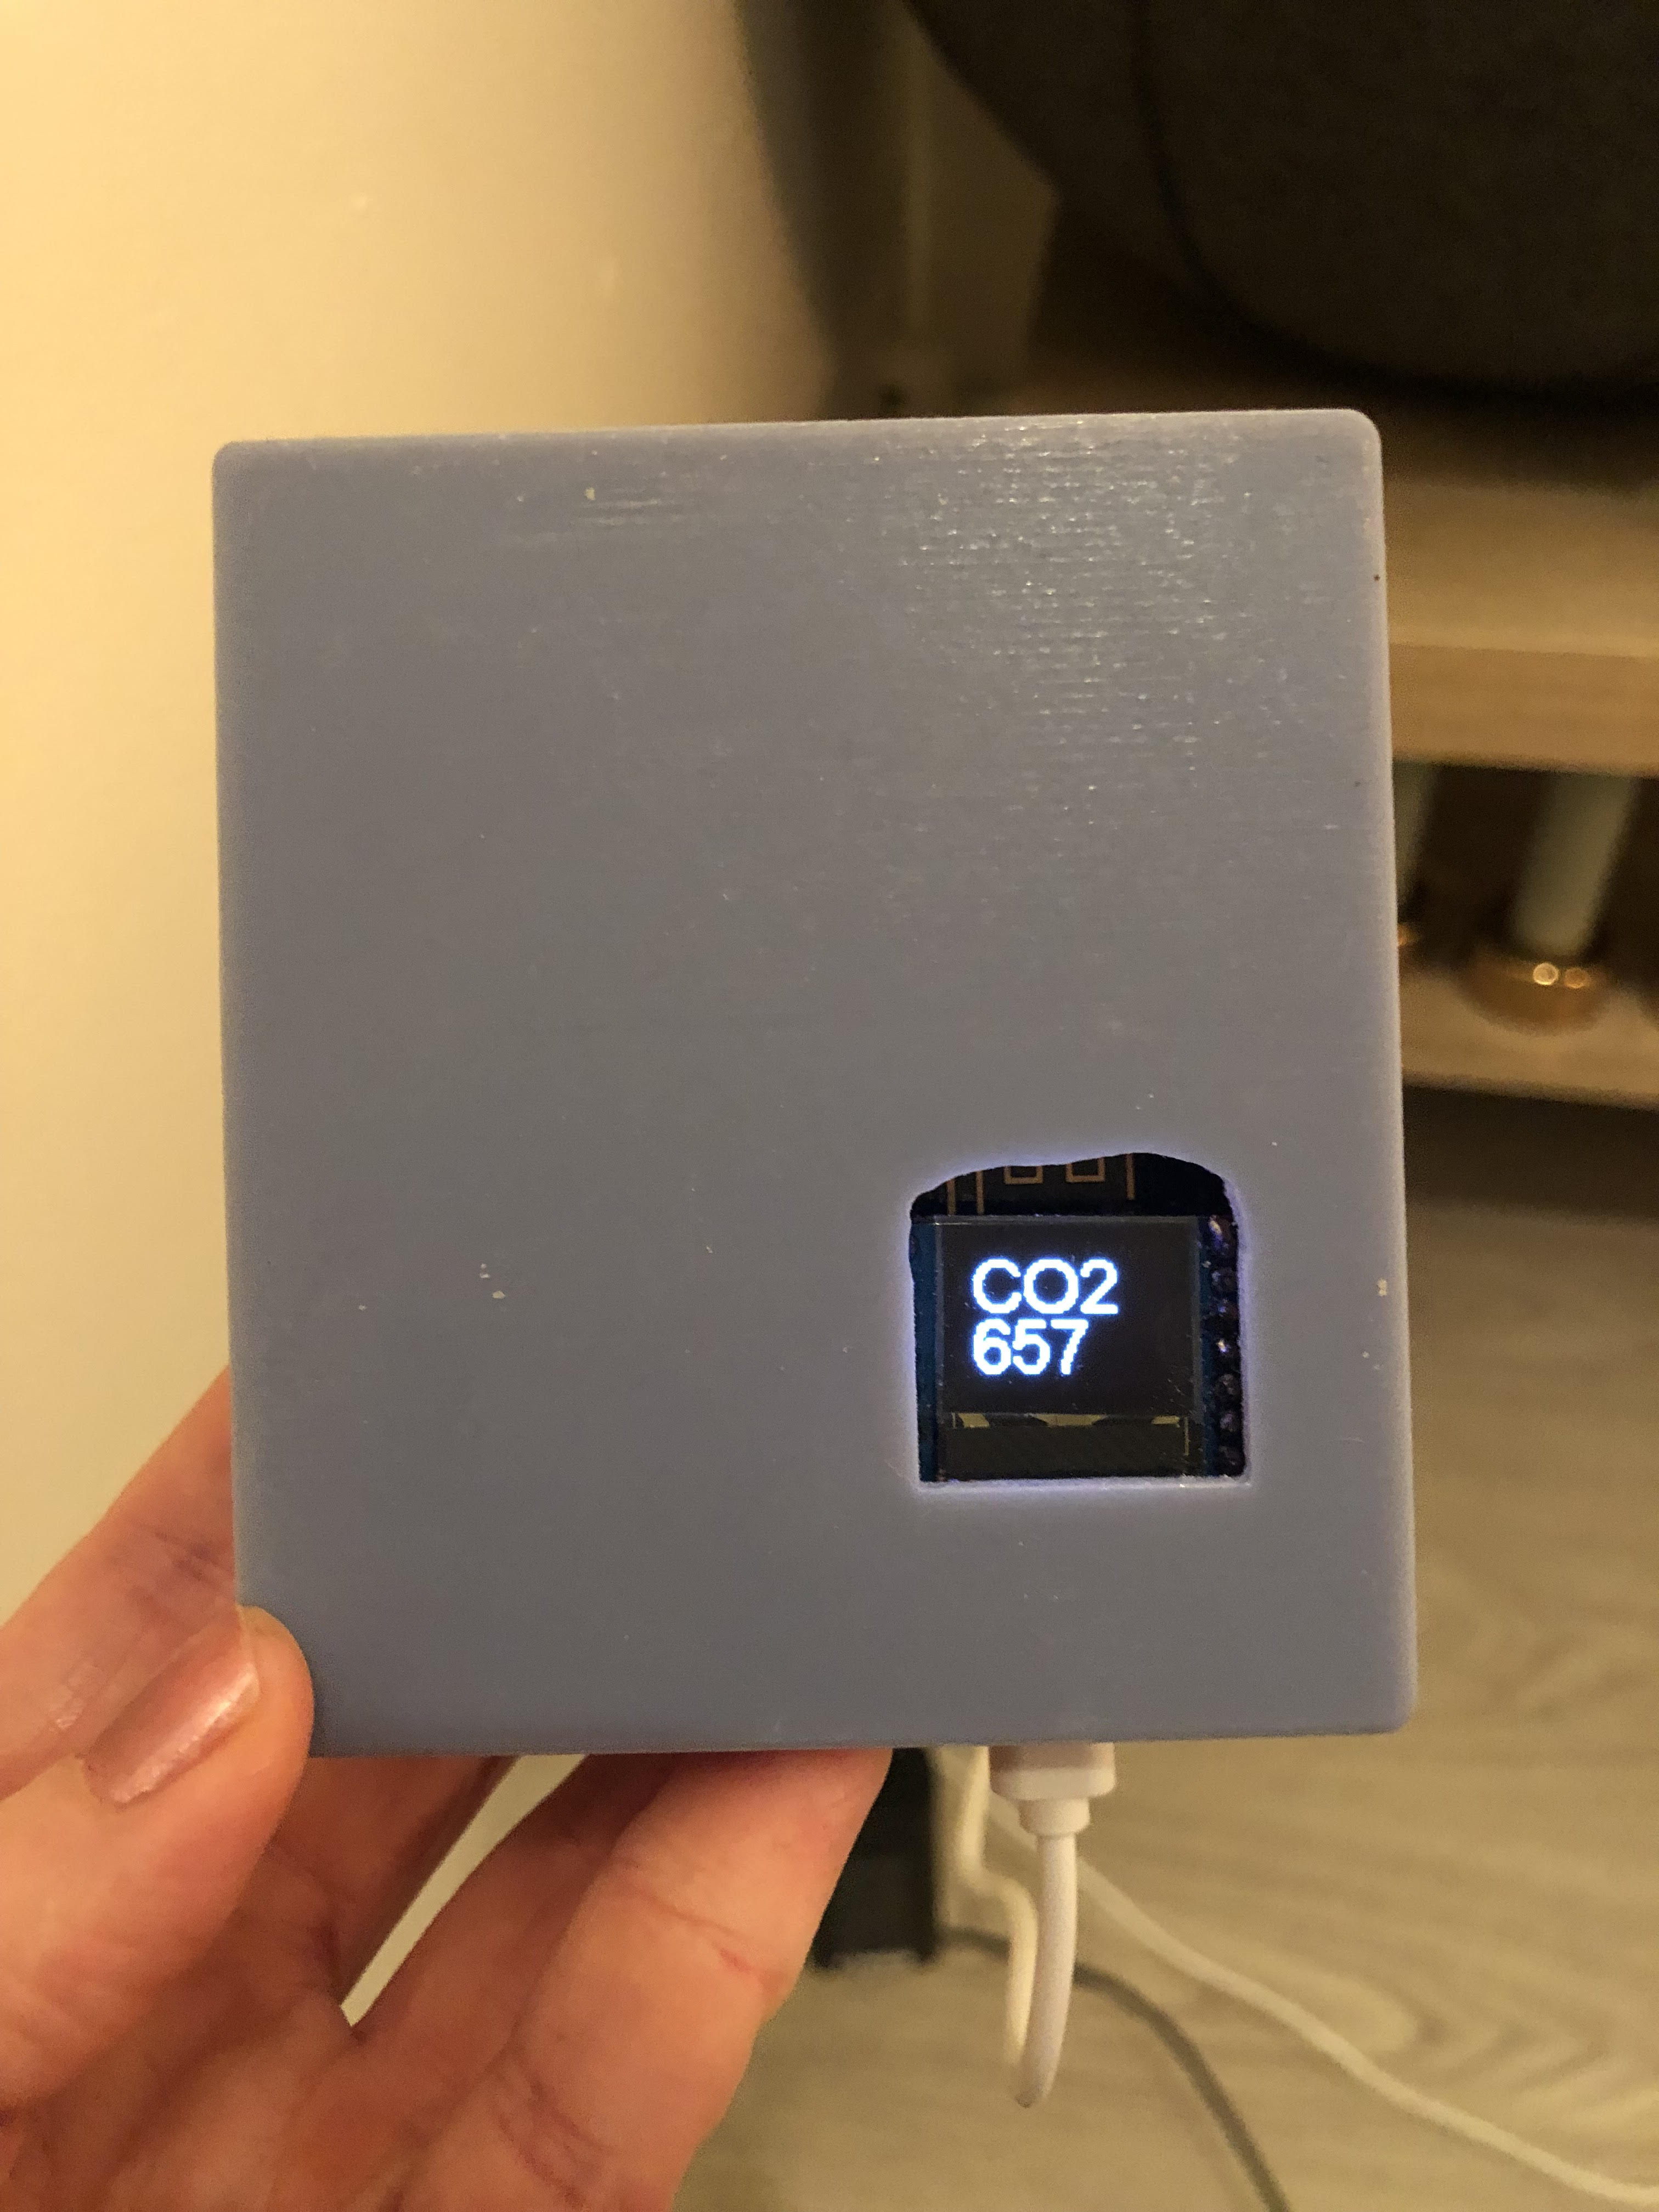
To nobody’s surprise, my burnt breakfast sent the AQ soaring to 200. I opened the window and turned on a box fan, bringing it down to slightly above the original level.
All in all, the air quality sensor was a manageable project and a fun foray in electronics. The components can all be purchased from AliExpress (links above) and the PCB can be printed using instructions from the AirGradient website. But AirGradient sells the kit at cost and includes the PCB. So, I would recommend buying from them and showing some support for fighters of the good AQ fight.
Comments